.widget.Profile .widget-content>a img.profile-img { min-width: 80px!important; min-height: 80px!important; max-width: 80px; border-radius: 40px; } .widget.Profile .widget-content>a img.profile-img { float: center; } .widget.Profile { text-align: center; float: center; margin: auto; }


Showing posts with label Cake Balls. Show all posts

30 January 2016

Lemon Cake Balls


For 2016, I wanted to work on getting back into blogging. And getting back in just the way I started -- small, attainable goals. What was the small goal? I wanted to post 4 times per month (i.e., once per week). Now clearly, we can see I did not post once a week. BUT, I still have two days to redeem myself. And, if I can muster up some energy and post today and tomorrow .... goal attained. Seeeeeeee ... there is still hope for me! It's odd really. I love blogging but I just seem to be really busy, really tired or both most days and when I finally have a day off ... I want to catch up on the ZZZ's or binge watch television. 

On a sad note ... my twenties are gone ::insert shocked emoji followed by sad emoji followed by screaming crying emoji :: I am officially 30! Did it have to come so fast?!? I never thought I would be THAT person who freaked out about age, but apparently I am. UGH! 30 ... it just hit me like a wall ...a sad pathetic wall of 30. Maybe it would not be so bad, if you know, I wasn't in school or maybe if I had a real job! To soften the blow, my sister and cousin flew out and my close friends here in Rhode Island came out for a birthday dinner. It was a really nice weekend and I felt very loved ... and if I have to be 30, I guess I would want it to start that way. ::tear::

The other day the hubby told me that he had to bring something to work, for his PI's (aka: boss') birthday and I was happy to hear that his PI's favorite flavor is lemon :) This made the hubby happy too, because he's a lemon fan. I wanted a cute way to incorporate cake without making cake, since it is a birthday party and they will ::surprise:: have cake. Well ... what is an awesome bite size way of enjoying cake?!? That would be cake balls, my friends. Plus I love making cake balls. Let's take a trip to summer when the weather isn't freezing and enjoy these lemon cake balls.


LEMON CAKE BALLS
A For the Love of Dessert Original Recipe

INGREDIENTS

Preheat oven to 350F degrees

FOR CAKE
1 box of lemon cake mix (I used Betty Crocker)
3 eggs
1 c. of water
1/3 c. of vegetable oil

16 oz. container of cream cheese frosting
8 oz. of white chocolate bark
1-2 tsp. vegetable oil
Yellow sprinkles

Note: I did not use lemon cake and lemon frosting, because I thought they may either be too tarte or too "lemony" sweet. But feel free to do make it extra lemon!

DIRECTIONS

Making the Cake balls (pops):
Make cake according to package instructions. Let cake cool completely. Once cooled, cut the edges off the cake (as well as top and bottom layers of the cake--the crusty part). In a large bowl using a food processor or your hands, crumble the cake into fine bits (I use my hands). Add between 1/4 to slightly less than 1/2 of the cream cheese frosting. Mix well. If too dry add a tablespoon of frosting at a time. You do not want it too moist because the cake ball will be too sticky.  

Roll into 1 1/2 inch round balls. Place in refrigerator until chilled, at least 30 minutes.

Dipping the cake balls (pops):
In the meantime, melt white chocolate bark according to package directions. This is my secret, once the chocolate is melted I stir in the vegetable oil. This makes the chocolate have a smoother and shinier coating :)

Now, I am going to tell you how I get perfectly dipped cake balls but if you have your own method that works-- you are more than welcome to do it that way -- this is just whats worked best for me.  

Once chocolate has melted, take the cake balls and while holding the top half, dip the bottom half into the chocolate, then dip a cake pop stick into the chocolate (about 1/2 inch) and push into the center of the cake ball until about, no more, than half way through. Let cool. This will make it much easier to dip the rest of the cake ball. Otherwise I have found that the cake balls get stuck in the  chocolate or falls off the stick.

Once cooled, dip the top of the cake balls and a little part of the bottom, that was already coated into the chocolate. Shake off excess chocolate. Garnish with sprinkles (while chocolate is still wet). Allow to cool by sticking into flower foam. Once dried, holding the cake ball with one hand, gently twist the cake pop stick with your other hand and pull out. If you would like cake pops- leave on stick. 

Also see: No Bake Cake Batter Truffles for "My Little Cupcake" method. 

Enjoy,

09 February 2014

Dark Chocolate-Strawberry Cake Balls


Keeping with my promise, I wanted to recap my birthday week. The first day that the hubby and I landed, we went to a birthday-sushi dinner! Of course, I would get sushi! Sushi in California is just a whole other level compared to sushi from Texas. So whenever I go, I like to get my fill. We actually had to have dinner the night before my actual birthday, because the hubby had a conference to attend -- which began on my birthday. I forgave him, only because he took me to Cali with him :) I had such a fun dinner. My family always puts a BIG smile on my face. My niece especially. She is old enough now to understand selfies and photobombing -- so there was a request made that we do one of each. I even did a selfie with my parents, because they are cute like that!


For the past couple years, for my birthday, instead of a cake, I have requested a pizookie platter. I love BJ's Restaurant and Brewhouse Pizookie! And I always get it half double chocolate and half chocolate chip cookie. And like a good family, they each take a picture with me in front of my "cake." I thought I would spare you from the corniness since I probably already overloaded on you with dinner. Although it was a pizookie platter, it was eaten up that evening-- just like a true dessert family would do. I really had such an awesome night filled with lots of laughs and love for my family-birthday dinner. It just reminded me, even more, how much I miss them!


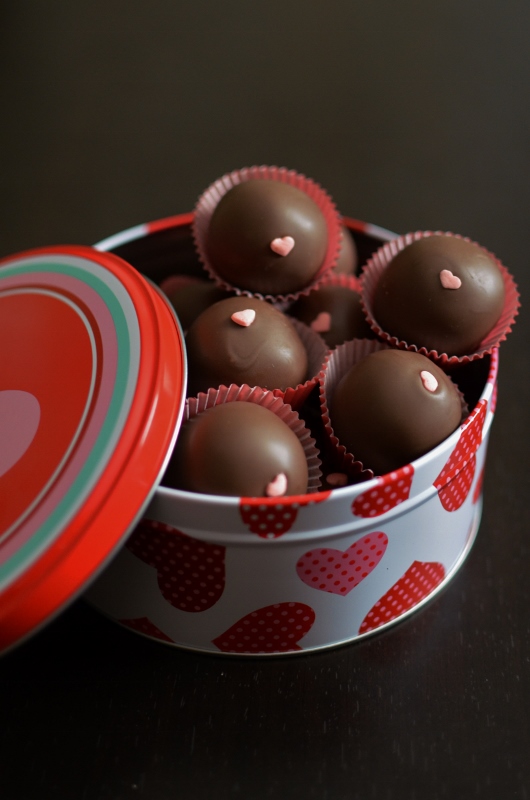
So, it is now Day 2 of my countdown to love....Valentine's Day! I wanted to make desserts that just exuded Valentine's. You know what is everywhere around Valentine's day? Chocolate covered strawberries! I love chocolate covered strawberries. That pseudo feeling of being healthy because your eating strawberries with that little kid inside of you smiling because you know its a dessert...I mean its COVERED in chocolate! Well, I wanted to make cake balls. Because, if I can toot my own horn....TOOT....I think I make amazing cake balls. I think they look good and taste good. Which says a lot because I have seen some "professional bakeries" that make cake balls which have chocolate pooled at the bottom ::yuck::. So, I decided to make a twist on the chocolate covered strawberry by doing a cake ball version. The hubby described it has a dark chocolate cake ball with a subtle hint of strawberry!


DARK CHOCOLATE STRAWBERRY CAKE BALLS 
A For the Love of Dessert Original Recipe

INGREDIENTS

Preheat oven to 350F degrees

FOR CAKE
1 box of dark chocolate cake mix (I use Duncan Hines)
3 eggs
1 c. of water
1/3 c. of vegetable oil

16 oz. container of Pillsbury strawberry frosting
8 oz. of candymelts or chocolate bark
1-2 tsp. vegetable oil
Valentine's Sprinkles

DIRECTIONS

Making the Cake balls (pops):
Make cake according to package instructions. Let cake cool completely (I usually cool over night). Once cooled, cut the edges off the cake (as well as top and bottom layers of the cake--the crusty part). In a large bowl using a food processor or your hands, crumble the cake into fine bits (I use my hands). Add slightly less than 1/2 of the strawberry frosting. Mix well. If too dry add a tablespoon of frosting at a time. You do not want it too moist because the cake ball will fall apart.  

Roll into 1 1/2 inch round balls. Place in refrigerator until chilled, at least 30 minutes.

Dipping the cake balls (pops):
In the meantime, melt either chocolate bark or candy melt according to package directions. This is my secret, once the chocolate is melted I stir in the vegetable oil. This makes the chocolate have a smoother and shinier coating :)

Now, I am going to tell you how I get perfectly dipped cake balls but if you have your own method that works-- you are more than welcome to do it that way -- this is just whats worked best for me.  

Once chocolate has melted, take the cake balls and while holding the top half, dip the bottom half into the chocolate, then dip a cake pop stick into the chocolate (about 1/2 inch) and push into the center of the cake ball until about, no more, than half way through. Let cool. This will make it much easier to dip the rest of the cake ball. Otherwise I have found that the cake balls get stuck in the  chocolate or falls off the stick.

Once cooled, dip the top of the cake balls and a little part of the bottom, that was already coated into the chocolate. Shake off excess chocolate. Garnish with sprinkles (while chocolate is still wet). Allow to cool by sticking into flower foam. Once dried, holding the cake ball with one hand, gently twist the cake pop stick with your other hand and pull out. If you would like cake pops- leave on stick. 

Also see: No Bake Cake Batter Truffles for "My Little Cupcake" method. 

Enjoy,
Chika

19 December 2013

Peppermint Cake Balls


The hubby found this seasonal Pillsbury Peppermint canned frosting. And if you remember from my Caramel Apple Cake Balls, the only time I use canned frosting is for cake balls. Well that and dipping animal crackers into -- remember Dunkaroos? I LOVED them and since they do not sell them anymore, I tried to recreate it myself. But it never is the same. Nevertheless, I knew that I can do both! Since you only need a little less than half a can of canned frosting, I could use the rest for dipping :)

I was going to make these cake balls two ways, with chocolate-peppermint and then vanilla-peppermint. But the hubby pointed out that I have done a lot of chocolate-mint recipes and I should try something different. Plus have you ever had Andes peppermint crunch? That's vanilla and peppermint....and pretty darn delicious! So I thought, for once, I would listen to the hubby ;)  And...maybe...just maybe (and as I tell my students when I teach...by maybe I mean yes)...I plan on making these next Christmas with a chocolate twist.

Cake balls are never easy but they are always a big hit. My second favorite dessert after cookies is cake balls. I LOVE THEM! That is why I always ask the hubby to get them for me for my birthday, anniversary and all celebrations. And remember this is not the last of my 12 Days of Christmas Holiday Countdown. This is only recipe #10. I still have two more to share. BUT since I have a delayed holiday party with my in-laws, I am saving the last two!


PEPPERMINT CAKE BALLS 
A For the Love of Dessert Original Recipe

INGREDIENTS

Preheat oven to 350F degrees

FOR CAKE
1 box of white cake mix (I use Duncan Hines)
3 eggs
1 c. of water
1/3 c. of vegetable oil

16 oz. container of Pillsbury Peppermint frosting
8 oz. of white candymelts or chocolate bark
1-2 tsp. vegetable oil
Christmas Sprinkles (3 tbsp.)

DIRECTIONS

Making the Cake balls (pops):
Make cake according to package instructions. Let cake cool completely (I usually cool over night). Once cooled, cut the edges off the cake (as well as top and bottom layers of the cake--the crusty part). In a large bowl using a food processor or your hands, crumble the cake into fine bits (I use my hands). Add slightly less than 1/2 of the peppermint frosting. Mix well. If too dry add a tablespoon of frosting at a time. You do not want it too moist because the cake ball will fall apart. 

Then fold in 2 tbsp. Christmas sprinkles into the batter (the dye of the sprinkles may bleed slightly). Roll into 1 1/2 inch round balls. Place in refrigerator until chilled, at least 30 minutes.

Dipping the cake balls (pops):
In the meantime, melt either chocolate bark or candy melt according to package directions. This is my secret, once the chocolate is melted I stir in the vegetable oil. This makes the chocolate have a smoother and shinier coating :)

Now, I am going to tell you how I get perfectly dipped cake balls but if you have your own method that works-- you are more than welcome to do it that way -- this is just whats worked best for me. Once chocolate has melted, take the cake balls and while holding the top half, dip the bottom half into the chocolate, then dip a cake pop stick into the chocolate (about 1/2 inch) and push into the center of the cake ball until about, no more, than half way through. Let cool. This will make it much easier to dip the rest of the cake ball. Otherwise I have found that the cake balls get stuck in the  chocolate or falls off the stick.

Once cooled, dip the top of the cake balls and a little part of the bottom, that was already coated into the chocolate. Shake off excess chocolate. Garnish with sprinkles (while chocolate is still wet). Allow to cool by sticking into flower foam. Once dried, holding the cake ball with one hand, gently twist the cake pop stick with your other hand and pull out. If you would like cake pops- leave on stick. 

Also see: No Bake Cake Batter Truffles for "My Little Cupcake" method. 

Enjoy,
Chika

24 October 2013

Caramel Apple Cake Balls (Pops)


There is something so whimsical about October. I think the start of school in September is supposed to signify the start of Fall, but let's be honest with ourselves, because it never does. Instead, it's the preparation of Halloween that takes place all October that gets people into the Fall spirit. When vendors start reintroducing all their pumpkin spice seasonal flavors. The aroma wafts all over the place, and captivates people :) I love it. And when there is pumpkin in the air, boots on your feet and a scarf around your neck -- you know Fall is here. I also love Halloween because it gets you into the holiday spirit. Once Halloween hits, the ball just keeps rolling: Thanksgiving, Christmas (and the shelves are already filled with Thanksgiving and Christmas decor), New Years, and Valentine's Day -- all of my favorites. Oh and my birthday!!!

I really love Holidays, but I think Halloween is especially fun because it let's your inner kid out. The month when your supposed to get sick on candy, give candy and dress up as your favorite character. When your supposed to bake too much dessert and day dream about costumes....it only happens once a year and I choose to embrace it. I love seeing the aisles just stocked with endless amounts of candy and chocolate. Flavors that you haven't seen in a year: candy corn, taffy and caramel apple...mmm...You just gotta go with the flow and love holidays for the whimsy that they are meant to be. Though I am not a fan of the adults who choose to detract from the whimsy of Halloween by attempting to make it "how inappropriately sexy" can I be. Oh-good-gosh....stop! If you have to use a holiday meant to let your inner child out to prove your self-worth, you are doing it wrong! :) But this is coming from a girl who dressed up as Elmo ;)

This post is exciting for me, because it is the first of my seven day Spooktacular count down to Halloween, each day sharing a different Halloween inspired treat :) AND this countdown is my first "special series of posts" meaning this is my first ever theme inspired post! I know, the things I get excited about, clearly suggest that I need a life outside of food and blogging ;) Well, I've been picking out recipes for sometime. I've been a bit busy but I woke up early this morning to rush to the store and fill up on my Halloween goodies. While there, of course, my plan went out the window because I stumbled upon this Caramel Apple Frosting by Pillsbury! Say what?!? I love caramel apples, they are so Fall and Halloween all wrapped up into one. I knew I had to find a way to use it. And there is only one instance in which I ever use canned frosting: Cake Balls! Decision made. They came out perfect! Happy first spooktacular post :)


CARAMEL APPLE CAKE BALLS
A For the Love of Dessert Original Recipe

INGREDIENTS

Preheat oven to 350F degrees

1 box of white cake mix (I use Duncan Hines)
3 eggs
1 c. of water
1/3 c. of vegetable oil
16 oz. container of Pillsbury Caramel Apple frosting
8 oz. of white candymelts or chocolate bark
1-2 tsp. vegetable oil
Sprinkles 

DIRECTIONS
Making the Cake balls (pops):
Make cake according to package instructions. Let cake cool completely (I usually cool over night). Once cooled, cut the edges off the cake (as well as top and bottom layers of the cake--the crusty part). In a large bowl using a food processor or your hands, crumble the cake into fine bits (I use my hands). Add slightly less than 1/2 of the caramel apple frosting. Mix well. If too dry add a tablespoon of frosting at a time. You do not want it too moist because the cake ball will fall apart. Roll into 1 1/2 inch round balls. Place in refrigerator until chilled, at least 30 minutes.

Dipping the cake balls (pops):
In the meantime, melt either chocolate bark or candy melt according to package directions. This is my secret, once the chocolate is melted I stir in the vegetable oil. This makes the chocolate have a smoother and shinier coating :)

Now, I am going to tell you how I get perfectly dipped cake balls but if you have your own method that works-- you are more than welcome to do it that way -- this is just whats worked best for me. Once chocolate has melted, take the cake balls and while holding the top half, dip the bottom half into the chocolate, then dip a cake pop stick into the chocolate (about 1/2 inch) and push into the center of the cake ball until about, no more, than half way through. Let cool. This will make it much easier to dip the rest of the cake ball. Otherwise I have found that the cake balls get stuck in the  chocolate or falls off the stick.

Once cooled, dip the top of the cake balls and a little part of the bottom, that was already coated into the chocolate. Shake off excess chocolate. Garnish with sprinkles (while chocolate is still wet). Allow to cool by sticking into flower foam. Once dried, holding the cake ball with one hand, gently twist the cake pop stick with your other hand and pull out. If you would like cake pops- leave on stick. 

Also see: No Bake Cake Batter Truffles for "My Little Cupcake" method. 

Enjoy,
Chika

30 June 2013

No Bake Golden Oreo Truffles


Today is the hubby and I's one year anniversary! They say the first year of marriage is always the hardest (though when talking to married couples I got the first five years...oh boy....). I do have to say- there was some time needed to adjust to living with one another, getting to know each others little quirks in how each of us liked to arrange things. It's amazing how much you continue to learn about your significant other when you start living together, no matter how long you dated before. Though- quirks, bumps and all-- it went by fast! It truly felt like I married the hubby just a month ago! I have loved every minute of married life and being a "Mrs." :) I really feel lucky to be married to the hubby! Happy Anniversary to us! I'll save the rest of the corny talk for the hubby!


Our day started off by giving each other our "surprises." We agreed to not be too extravagant, as we just like simple things BUT I cheated. See, I married a gamer. I have come to terms with that ;) And the Nintendo Wii-U came out. And so I decided to splurge and get the hubby the new system, which I knew he wanted (sadly, I found out the Play Station 4 is coming out....so I see that in my near future ;). I also got him a game to go along with it. He was sooo excited! It was absolutely adorable! He was expecting something small- like a basket of treats he has never tried before, maybe some shirts for work, but not a gaming system. Score for me! And I am quite proud of myself- because I did the research and everything myself- and not being a gamer- I have to say, it's quite complicated. The hubby got me, by far, my favorite card ever! It was so sweet! And my favorite flowers and one of my favorite treats- cake balls :) I may have already eaten them all :/


For dinner we headed off to one of College Station's few "nice" restaurants.  It's called Christopher's World Grille. I like it because even though it is  "fancy" it's really quite simple and not pretentious. You can really sit down and have a nice quiet, romantic meal. For our appetizer I got the crawfish and shrimp fondue (for two- but the hubby's not a fan of shrimp or crawfish) and the hubby got onion soup. Then for our main course, I got a chicken with goat cheese mashed potatoes and fresh veggies. The hubby got a snapper with veggies. And for dessert- I got a napoleon and the hubby got a spiced toffee cake. This place had a TON of desserts. And I love it! I truly will pick restaurants based on their desserts and not their main entrees. It was super sweet- because when we had made our reservations they asked us if it was for something "special" and we told them our first wedding anniversary. Well- when my dessert came out- I got a specially decorated dessert from the chef :)We finished the night off by eating the top tier of our wedding cake! It was perfect!


And since it is our anniversary. I cannot share anything but dessert. And so I decided to do one dessert that did two things: (1) keep the theme of cake balls/truffles going and (2) make a pun on the hubby and I. I present you Golden Oreo Truffles. Have you ever had traditional Oreo Truffles? I saw this twist to the Oreo Truffle using the Golden Oreos instead. It seemed really cute, so I tried it. Plus it keeps to my anniversary theme of cake balls. Then- Golden Oreo balls, ::laugh::, are the hubby and me- a little bit of vanilla and a little bit of chocolate to make awesome ::cue corny:: COME ON...its funny right?


NO BAKE GOLDEN OREO TRUFFLES 
Slightly Adapted from Sally's Baking Addiction

INGREDIENTS

1 family size package of Golden Oreos, finely crushed
8 oz. cream cheese, room temperature
12 oz of baking chocolate (or Candy Melts)*
1-2 tsp. vegetable oil
Sprinkles

*Ghiradelli's Baking Bars are delicious but regular store brands work wonderfully too!

DIRECTIONS

Making the Oreo Truffles:
First crush Oreos. Here is what you can do:

  • The family size Oreo pack comes in three columns. I divided each column in half. I placed each of the these "batches," one at a time, in the food processor to get a nice, even consistency of crushed Oreo. If you put too many Oreo in the food processor at once, you are likely to get lumps of cookie that are not crushed. 
  • If you do not have a food processor- you can crush the Oreos by placing each batch in (1) in a blender or (2) in a freezer size Ziplock back and crushing them by hand or with a rolling pin.
After each batch was crushed, I dumped them into the bowl of a stand mixer, fitted with paddle attachment. Once all the Oreo have been crushed and placed in the bowl- add in the cream cheese. Mix until well combined and a dough like consistency has formed. When you have reached a dough like consistency- roll into 1 inch sized truffles. Place in freezer for 15 minutes or in refrigerator for about 30 minutes.

Dipping the Oreo Truffles:
In the meantime, melt either chocolate bark or candy melts according to package directions. This is my secret, once the chocolate is melted I stir in the vegetable oil. This makes the chocolate have a smoother and shinier coating :)

Now, I am going to tell you how I get perfectly dipped cake truffles but if you have your own method that works-- you are more than welcome to do it that way--this is just whats worked best for me. Once chocolate has melted, take an Oreo truffle and while holding the top half, dip the bottom half into the chocolate, then dip a cake pop stick into the chocolate (about 1/2 inch) and push into the center of the truffle until about, no more, than half way through. Let cool. This will make it much easier to dip the rest of the truffle- otherwise I have found that the truffle either gets stuck in the chocolate or falls off the stick.

Once cooled, dip the top of the truffle and a little part of the bottom, that was already coated into the chocolate. Immediately cover with sprinkles and allow to cool by sticking into flower foam. Once dried- holding the truffle with one hand, gently twist (while pulling slightly down) the cake pop stick with your other hand, and pull the stick out.

If you love these check out my No Bake Oreo Truffles and No Bake Red Velvet Oreo Truffles. 

Enjoy,
Chika

27 February 2013

No-Bake Cake Batter Truffles


I am back :) It is now 12.26am. To some- this might be a normal time to be awake. For me--it is not. I like to sleep! Strike that- I LOVE TO SLEEP :) But as, I left off yesterday-- I ended up staying up, pretty much all night catching up on some reading and completing some assignments! And then still ended up working through the day to complete them. I was truly exhausted. So after, taking Ninja to the dog park, because the hubby had to work late-- I passed out! It felt so so good :) I ended sleeping and may have just woken up ;) Nothing wrong with that right?

Remember my goal of posting more dessert recipes or sweet related posts? Well- my new "thing" in trying to keep up with that-- is for every two non-dessert recipes, I would post a dessert recipe or cupcakery review.  Maybe I could convince the hubby to eat dessert for dinner? I mean, who would not love that-- and then I could post more dessert recipes! Well- I decided to make these No-Bake Cake Batter Truffles that I have seen flying around Pinterest and the internet. With all that- I was just so curious to try them! I mean- cake batter? sold! Truffles? double sold ;) That combination sounded awesome. 

For my birthday, one of the many things that I got was a My Little Cupcake Set. I was really excited to use the molds in the set: a cupcake mold along with a ball, heart and Christmas tree molds. When I have made cupcake shaped cake balls in the past (see: Carrot Cake Balls)- I have just used a mini-flower cookie cutter-- a technique I learned from Bakerella's Cake Pop book. They would come out alright- but a little bit flat on top and took quite a bit of time to shape. The My Little Cupcake- Cupcake Mold made these adorable little cupcakes in a jiffy! But I do have to say that after dipping them- some of the more detailed mold lines did show through the chocolate coating. But I did notice that on their own website (so I guess it's normal). But I can live with that, because these took no time at all to mold :) I cannot wait to try the other molds!


NO-BAKE CAKE BATTER TRUFFLES

INGREDIENTS

1 stick of butter, softened
1/2 c. sugar
1 1/2 c. flour
1 c. yellow cake mix
2 tsp. vanilla
3 tbsp. heavy cream (can substitute with milk)
3 tbsp. sprinkles
8 oz. chocolate candy melts*
8 oz. pink candy melts or chocolate bar*
1-2 tsp. vegetable oil
Mini M&Ms and Sprinkles for decoration**

* or other desired candy melt color
** optional (if you do not want to decorate)

DIRECTIONS

In the bowl of a stand mixer fitted with paddle attachment, cream together butter and sugar on medium-high speed for 6-8 minutes. Blend in vanilla. 

Sift flour and cake mix into a small bowl- then whisk together. Add dry ingredients to butter-sugar blend on low speed. Add heavy cream, one tablespoon at a time to make a dough-like consistency (if, after 3 tbsp. of heavy cream- you still do not have a dough like consistency--add more cream--slowly). 

Once dough like consistency is achieved- mix in sprinkles by hand.The best way to do this is to take the dough out of the bowl, and place on a large baking mat. Add sprinkles to the top of the dough and kneed dough to spread out sprinkles. Continue to kneed dough until sprinkles are evenly distributed.

To shape Cake Batter Truffles: 
Use a cookie scoop to scoop out even sizes of dough. Then
1. Ball shape: Roll dough into balls and place on parchment paper, wax paper or aluminum foil. 

2. For cupcake shaped balls using a mini-flower cookie cutter: Roll balls into logs. Fit logs into a 1 1/4-by-3/4-inch flower-shaped cookie cutter. Push truffle mixture into the cutter halfway so that some of the cake-batter mixture extends beyond the top of the cutter. Shape extended cake-batter mixture into a cupcake-shaped top. Push cake from cutter to remove. 

3. My Little Cupcake Set mold: take dough and place into mold. Close mold (do not squeeze it shut- as it will be hard to remove the dough from mold. Instead, gently close it and let the mold do all the work :) Wipe off excess dough before opening the mold. Then open the mold, gently take the dough out and you should have a cute little cupcake shape!

*Refrigerate the truffles for 15 minutes in the freezer or 30 minutes in the refrigerator. 

To Dip Cake Batter Truffles:

In the meantime, melt either chocolate bark or candy melts according to package directions. This is my secret, once the chocolate is melted I stir in the vegetable oil. This makes the chocolate have a smoother and shinier coating :)

For truffle balls
While holding the top of the truffle, dip the bottom portion into the candy melt. Then dip a cake pop stick into the candy melt (about 1/2 inch) and push into the center of cake truffle until, no more, than 1/2 way through. Let cool. This will make it much easier to dip the rest of the truffle- otherwise I have found that the truffles either gets stuck in the candy melt or falls off the stick. Once cool, dip the top part of the truffle and a little bit of the portion already coated into the candy melt. Cover with sprinkles. Allow to cool. Once cool, in a gentle twisting-pulling down motion, remove stick. This prevents a pool of chocolate from forming at the bottom and keeps a nice round shape to the truffle ball. 

For the cupcake shaped truffle
Dip the bottom of each cupcake into the chocolate candy melt; then dip a cake pop stick into the candy melt (about 1/2 inch) and push into the center of cake truffle until 1/2 way through. Let cool. This will make it much easier to dip the rest of the truffle (the top of the cupcake). Once cool, dip the tops of the cupcakes into the pink (or white) candy melt. Top with a mini-M&M and cover with sprinkles. Allow to cool. 

Keep refrigerated. 

Enjoy,
Chika

Blog design by Bella Lulu Ink